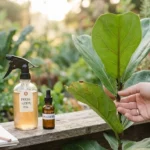
You just bought a beautiful new Monstera or Fiddle Leaf Fig. You are ready to repot it into a stylish ceramic planter. You remember the golden rule your grandmother or the local florist told you: “Put an inch or two of gravel, rocks, or broken pottery at the bottom of the pot. It helps with drainage.”
It sounds logical, right? The water will flow through the soil, hit the rocks, and drain away safely… As a Forest Engineer specializing in soil hydrology, I have some bad news for you: This is the single biggest myth in indoor gardening.
By adding that “drainage layer,” you are not helping your plant drain. You are actually fighting against the laws of physics. You are raising the water table closer to the roots, essentially building a drowning chamber for your plant.
Let’s break down the science of why this happens and what you should do instead.
1. The Physics Lesson: The “Sponge” Analogy
To understand why rocks are bad, we first need to understand how water moves through soil. In engineering, we call this the “Perched Water Table” (PWT).
Think of your potting soil as a tall kitchen sponge.
- Soak the sponge in water and hold it vertically.
- Gravity pulls the water down, but the sponge’s Pores hold onto some of it tightly.
- The Result: The bottom inch of the sponge remains saturated and soggy, while the top is moist but airy.
That soggy bottom layer is the Saturation Zone. Every container, no matter what, has this zone at the bottom where gravity and Capillary Action (the soil holding onto water) are in a stalemate. The water “perches” there because the soil holds it tighter than gravity pulls it.
2. The Gravel Mistake: Capillary Action vs. Gravity
Here is where the “gravel myth” falls apart. Water moves easily through materials of the same texture. But water hates moving from a fine-textured material (like potting soil) to a coarse-textured material (like rocks) unless it is forced to.
The Mechanism: The tiny pores in the soil hold onto the water with strong capillary force. The large air gaps between the rocks have zero pull. When the water hits the rock layer, it stops. It refuses to enter the large gaps until the soil above it is 100% saturated. So, instead of the water draining through the rocks, it sits on top of them.
The Fatal Flaw: By adding 2 inches of rocks to a 6-inch pot, you haven’t added drainage. You have simply moved the “Saturation Zone” (that soggy sponge bottom) UP by 2 inches.
- Without Rocks: The soggy soil is at the very bottom of the pot (6 inches deep), likely away from most roots.
- With Rocks: The soggy soil is now right in the middle of the pot (4 inches deep), directly surrounding the sensitive root system.
- Result: Root Rot. The roots sit in stagnant water, run out of oxygen, and turn to mush.
3. “But My Pot Doesn’t Have a Hole!”
I hear this excuse often: “I put rocks because my decorative pot doesn’t have a drainage hole. It creates a reservoir.”
Engineer’s Warning: There is no such thing as a healthy plant in a pot without a hole. Creating a “reservoir” of stagnant water at the bottom of a sealed pot is creating a septic tank.
- Anaerobic Bacteria: Bacteria that live without oxygen will breed in that rocky, stagnant water.
- Toxicity: As organic matter leaches down, the water turns toxic (sulfides).
- Death: Eventually, the roots will grow down into that toxic sludge and die. The plant will collapse from the bottom up.
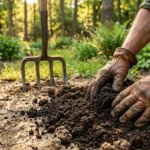
4. The Engineer’s Solution: How to Drain Correctly
So, if gravel is the enemy, how do you prevent root rot? Follow these engineering protocols:
Protocol A: The “Uniformity” Rule Use the same soil mix from the very bottom of the pot to the very top. Do not put anything at the bottom—no rocks, no shards, no Styrofoam peanuts. By keeping the soil continuous, you maximize the vertical height. This keeps the “Saturation Zone” as low as possible, far away from the main root ball.
Protocol B: The “Cachepot” Method (Double Potting) If you love that expensive ceramic pot with no hole, use it as a cover (Cachepot).
- Plant your greenery in a cheap plastic nursery pot with drainage holes.
- Place the plastic pot inside the decorative ceramic pot.
- Watering: When you water, take the plastic pot out, water it in the sink, let it drain completely, and then put it back.
- Bonus: This is the only time you can use rocks—put them inside the decorative pot (under the plastic pot) to keep the plastic pot elevated above any excess water drippings.
Protocol C: The “Wick” Trick If you have a very tall pot and want to eliminate the soggy bottom, dangle a piece of synthetic rope (nylon) out of the drainage hole. The rope acts as a wick, physically pulling the perched water out of the soil and dripping it away via gravity. It breaks the capillary tension.
Conclusion: Trust Physics, Not Myths
Plants have evolved for millions of years to grow in soil, not on top of a pile of rocks. The “drainage layer” is an old gardening habit that needs to die. It wastes space in your pot and endangers your plants.
The best gift you can give your indoor plants is simple: High-quality soil, a pot with a hole, and zero obstructions at the bottom. Let gravity do its job.