Here is the expanded, 600+ word version of the blog post. I have enriched it with more scientific context, practical troubleshooting tips (“The Engineer’s Fix”), and a deeper explanation of the biological processes to make it a comprehensive guide.
Stop Throwing Away Your Future Soil! Why Your Kitchen Scraps are Actually “Black Gold” (An Engineer’s Guide)
Category: Sustainability / Soil Science / Gardening Reading Time: 6 Minutes
Every evening, in millions of kitchens around the world, a tragedy occurs. We chop vegetables for dinner, peel potatoes, make coffee, and crack eggs. Then, without a second thought, we toss the peels, grounds, and shells into the trash bin. We tie up the plastic bag and send it to a landfill.
We see this organic matter as “garbage.” As a Forest Engineer, I see it differently. To me, that bin isn’t full of waste; it is full of the world’s most valuable, nutrient-dense plant food. By throwing it away, you are essentially throwing away free energy.
Think about a forest for a moment. No one walks into the woods with a bag of chemical fertilizer to feed the oak trees, right? Yet, forests are lush, green, and self-sustaining for centuries. How? Because nature has a perfect Closed-Loop System: Leaves fall, animals leave waste, and plants die. Microorganisms break this down into humus, returning nutrients to the soil to feed the next generation.
Today, I will show you how to replicate this magnificent natural factory right in your own kitchen or balcony.
What is Compost Exactly? (The Biology)
Simply put, composting is the controlled process of aerobic decomposition. It is the biological act of turning organic matter (fruit, veggies, leaves) into a dark, earthy material called Humus.
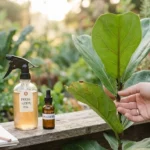
Gardeners call this “Black Gold.” We engineers call it “Soil Amendment.” Unlike chemical fertilizers, which force-feed plants like an energy drink, compost rebuilds the structure of the soil itself. It improves drainage in clay soil, retains water in sandy soil, and introduces billions of beneficial bacteria to your garden. And the best part? It is completely free.
The Chemistry: Greens vs. Browns (The C:N Ratio)
You don’t need a degree in chemistry to compost, but you do need to understand one simple balance: Carbon (C) vs. Nitrogen (N). The microorganisms that break down your waste need a balanced diet. If you give them too much of one, the process fails.
1. The Greens (Nitrogen – The Fuel) This is the “wet” stuff. It provides the protein and moisture for the bacteria to grow and reproduce rapidly. This is what heats up the pile.
- Examples: Vegetable scraps, fruit peels, coffee grounds (yes, they are brown in color but chemically “Green”), tea bags, fresh grass clippings.
2. The Browns (Carbon – The Structure) This is the “dry” stuff. It provides the energy (carbohydrates) for the bugs and creates air pockets (aeration) so the pile doesn’t suffocate.
- Examples: Cardboard (egg cartons, toilet paper rolls), dry leaves, sawdust, black and white newspaper, straw, dried grass.
The Golden Ratio: Aim for 2 parts Brown to 1 part Green. Most beginners fail because they have too many Greens (kitchen scraps) and not enough Browns. This leads to a slimy, smelly mess.
The Engineering Protocol: The “Lasagna Method”
You can do this on a large scale in a backyard pile, or on a small scale under your sink with a Bokashi bucket or worm bin. The principle is the same. Think of it like building a lasagna.
Step 1: The Foundation (Airflow) Always start with a thick, coarse layer of “Browns” (twigs or thick cardboard) at the bottom of your bin. This acts like a drainage layer and allows oxygen to enter from below.
Step 2: The Nitrogen Injection Pour in your kitchen scraps (Greens). Spread them out; don’t leave them in a clump.
Step 3: The Carbon Blanket (Crucial Step) This is the most important rule of composting. Never leave wet food exposed. Every time you add a bucket of kitchen scraps, you must cover it immediately with a thick layer of Browns (sawdust, shredded paper, or dry leaves).
- Why? This “blanket” filters the smell, discourages fruit flies, and balances the moisture. If you can smell your compost, you didn’t add enough Browns.
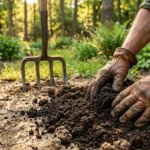
Step 4: Aeration (The Lungs) Decomposition requires Oxygen. If the pile gets too compacted, the good bacteria die and the bad (anaerobic) bacteria take over—that’s when it stinks like rotten eggs. Every few weeks, use a pitchfork or shovel to turn the pile and let it breathe.
The “Do Not Compost” List (The Danger Zone)
To keep your compost healthy and pest-free, strictly avoid putting these in your standard home bin:
- Meat, Fish, and Bones: They decompose too slowly, smell terrible, and attract rats and raccoons.
- Dairy Products: Cheese, milk, and yogurt create anaerobic conditions and smell rancid.
- Oily or Greasy Leftovers: Oil coats the organic matter, making it waterproof and impossible for bacteria to break down.
- Diseased Plant Leaves: The heat of a home compost pile often isn’t high enough to kill pathogens (like tomato blight), so you risk re-infecting your garden next year.
- Pet Waste (Dogs/Cats): This contains parasites and pathogens like E. coli. Keep it out.
The Result: Closing the Loop
Depending on the temperature and your effort (turning the pile), in 3 to 6 months, the magic happens. You will look in the bin and see that the apple cores and eggshells have vanished. In their place, you will find dark, crumbly, sweet-smelling earth that smells like a forest floor after rain.
This is the ultimate prize. Sprinkle this “Black Gold” on your houseplants, mix it into your vegetable patch, or spread it on your lawn. Nature doesn’t create waste; it creates cycles. By composting, you stop being a consumer and start being a producer.
Start today. Save your coffee grounds. Tear up your egg cartons. Join the loop.